Everything works until it doesn’t. And like Murphy’s Law wisely states, everything that can go wrong will inevitably go wrong. And things breaking down at home are no exception to the rule.
Even though many house repairs are best left to the hands of professionals, there are several repairs you can do for yourself. This doesn’t just save you money, but you can also learn valuable skills in the process.
So, without further ado, here are the best DIY house repairs for beginners.
To solve this, you’ll need an adjustable spanner, a screwdriver (or several because of different screw types and manufacturers), lubricant and potentially O-rings and a replacement cartridge.
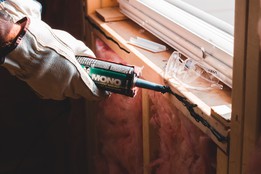
Adding a Plug Socket from scratch is quite challenging, which is best left for professionals. However, it’s considerably easier to convert a single socket to a double one. Here’s what you need to do.
Cracked tiles are not only ugly, they can keep deteriorating if nothing is done about them. This is especially true for floor tiles since pressure is regularly applied to them. The good news is you can repair them instead of replacing them. Here are some ideas to make your cracked tiles look like new.
Minor crack
Major crack
Light bulbs are pretty easy to change, so there’s nothing to worry about if you do it carefully. Here’s what you need to do.
After turning the power on again, you’ll see the light again! Bear in mind there are different types of bulbs and connections, and these instructions are for screw bulbs only. For more complicated setups, it’s best to call a professional.
Even though many house repairs are best left to the hands of professionals, there are several repairs you can do for yourself. This doesn’t just save you money, but you can also learn valuable skills in the process.
So, without further ado, here are the best DIY house repairs for beginners.
1- Fix a Leaking Tap
To solve this, you’ll need an adjustable spanner, a screwdriver (or several because of different screw types and manufacturers), lubricant and potentially O-rings and a replacement cartridge.
- The first thing you need to do is cut off the water supply. This is a preventive measure that can help if you make any mistakes.
- With the water supply completely off, use a screwdriver to remove the upper part of the knobs.
- Using lubricant, unscrew and take the faucet handle off the stem. With the spanner, you can loosen the nut. Depending on the faucet, you might need to twist the stem off, or it’ll pop out.
- Look for damage and replace any damaged parts. One of the most common culprits is the O-ring. This ring-shaped rubber sometimes leaks, and the best solution is to simply change it for a new one, cleaning everything before installing it.
- Put everything back the way it was and check if the issue is solved.
2- Add a Plug Socket
Adding a Plug Socket from scratch is quite challenging, which is best left for professionals. However, it’s considerably easier to convert a single socket to a double one. Here’s what you need to do.
- Interrupt the power supply.
- Unscrew the faceplate and disconnect the cables. Remember that in Ireland, green is ground, blue is neutral, and black, brown and grey are lines. Use a tester to check that there’s no electricity.
- Pass the cables through the knockout in the double box, and mark the fixing holes on the wall. Ensure there aren’t any cables or pipes, and drill the holes.
- Screw the double box and connect the cables according to what you’ve checked before removing the single socket.
- Fit the faceplate
3- Repair a Cracked Tile
Cracked tiles are not only ugly, they can keep deteriorating if nothing is done about them. This is especially true for floor tiles since pressure is regularly applied to them. The good news is you can repair them instead of replacing them. Here are some ideas to make your cracked tiles look like new.
Minor crack
- If it’s a minor crack, you can use nail polish of a matching colour.
- Clean the tile thoroughly and apply the nail polish until the crack is completely covered and 1-2 mm on both sides.
- Wait for it to dry and repeat as necessary.
Major crack
- If it’s a more important crack, you’ll need 2-part epoxy for the job. Start by cleaning the cracked tile thoroughly. Use a brush to remove any debris and grime.
- Mix the 2-part epoxy until it’s fully blended. It’ll start to harden, so you’ll need to move fast.
- Put a layer of epoxy covering the entire crack, and about a half centimetre on both sides. Wipe away any excess.
- After seven days, it’ll be cured completely. You can then paint over the epoxy to match the tile’s colour.
4- Change a Light Bulb
Light bulbs are pretty easy to change, so there’s nothing to worry about if you do it carefully. Here’s what you need to do.
- Interrupt the power supply.
- If you’re using a lamp, you might need to remove a screen or decorative elements to access the light bulb. Use a screwdriver if necessary, and remove it.
- Grab the base of the lamp with one hand, and unscrew the light bulb with the other one.
- Screw a new light bulb and assemble the lamp.
After turning the power on again, you’ll see the light again! Bear in mind there are different types of bulbs and connections, and these instructions are for screw bulbs only. For more complicated setups, it’s best to call a professional.
5- Unclog a drain
Nobody likes a clogged drain, and there are some things you can try before calling a plumber. You’ll need a plunger and perhaps a drain snake and drain cleaning products.- Get a plunger for sinks and plunge up and down. Stop and repeat this process a few times. Check if the clog is gone.
- If it isn’t, try using a drain snake. You need to insert it down the pipe, and if it gets stuck, use thrusting movements. Check if the clog is gone.
- If it isn't, try using a drain-cleaning solution. However, bear in mind these contain chemicals that can be harmful to both you and the pipe. Some require a waiting period of 24 hours.